
Blender Planets: A Reusable Skill for Building Worlds from Real NASA Maps
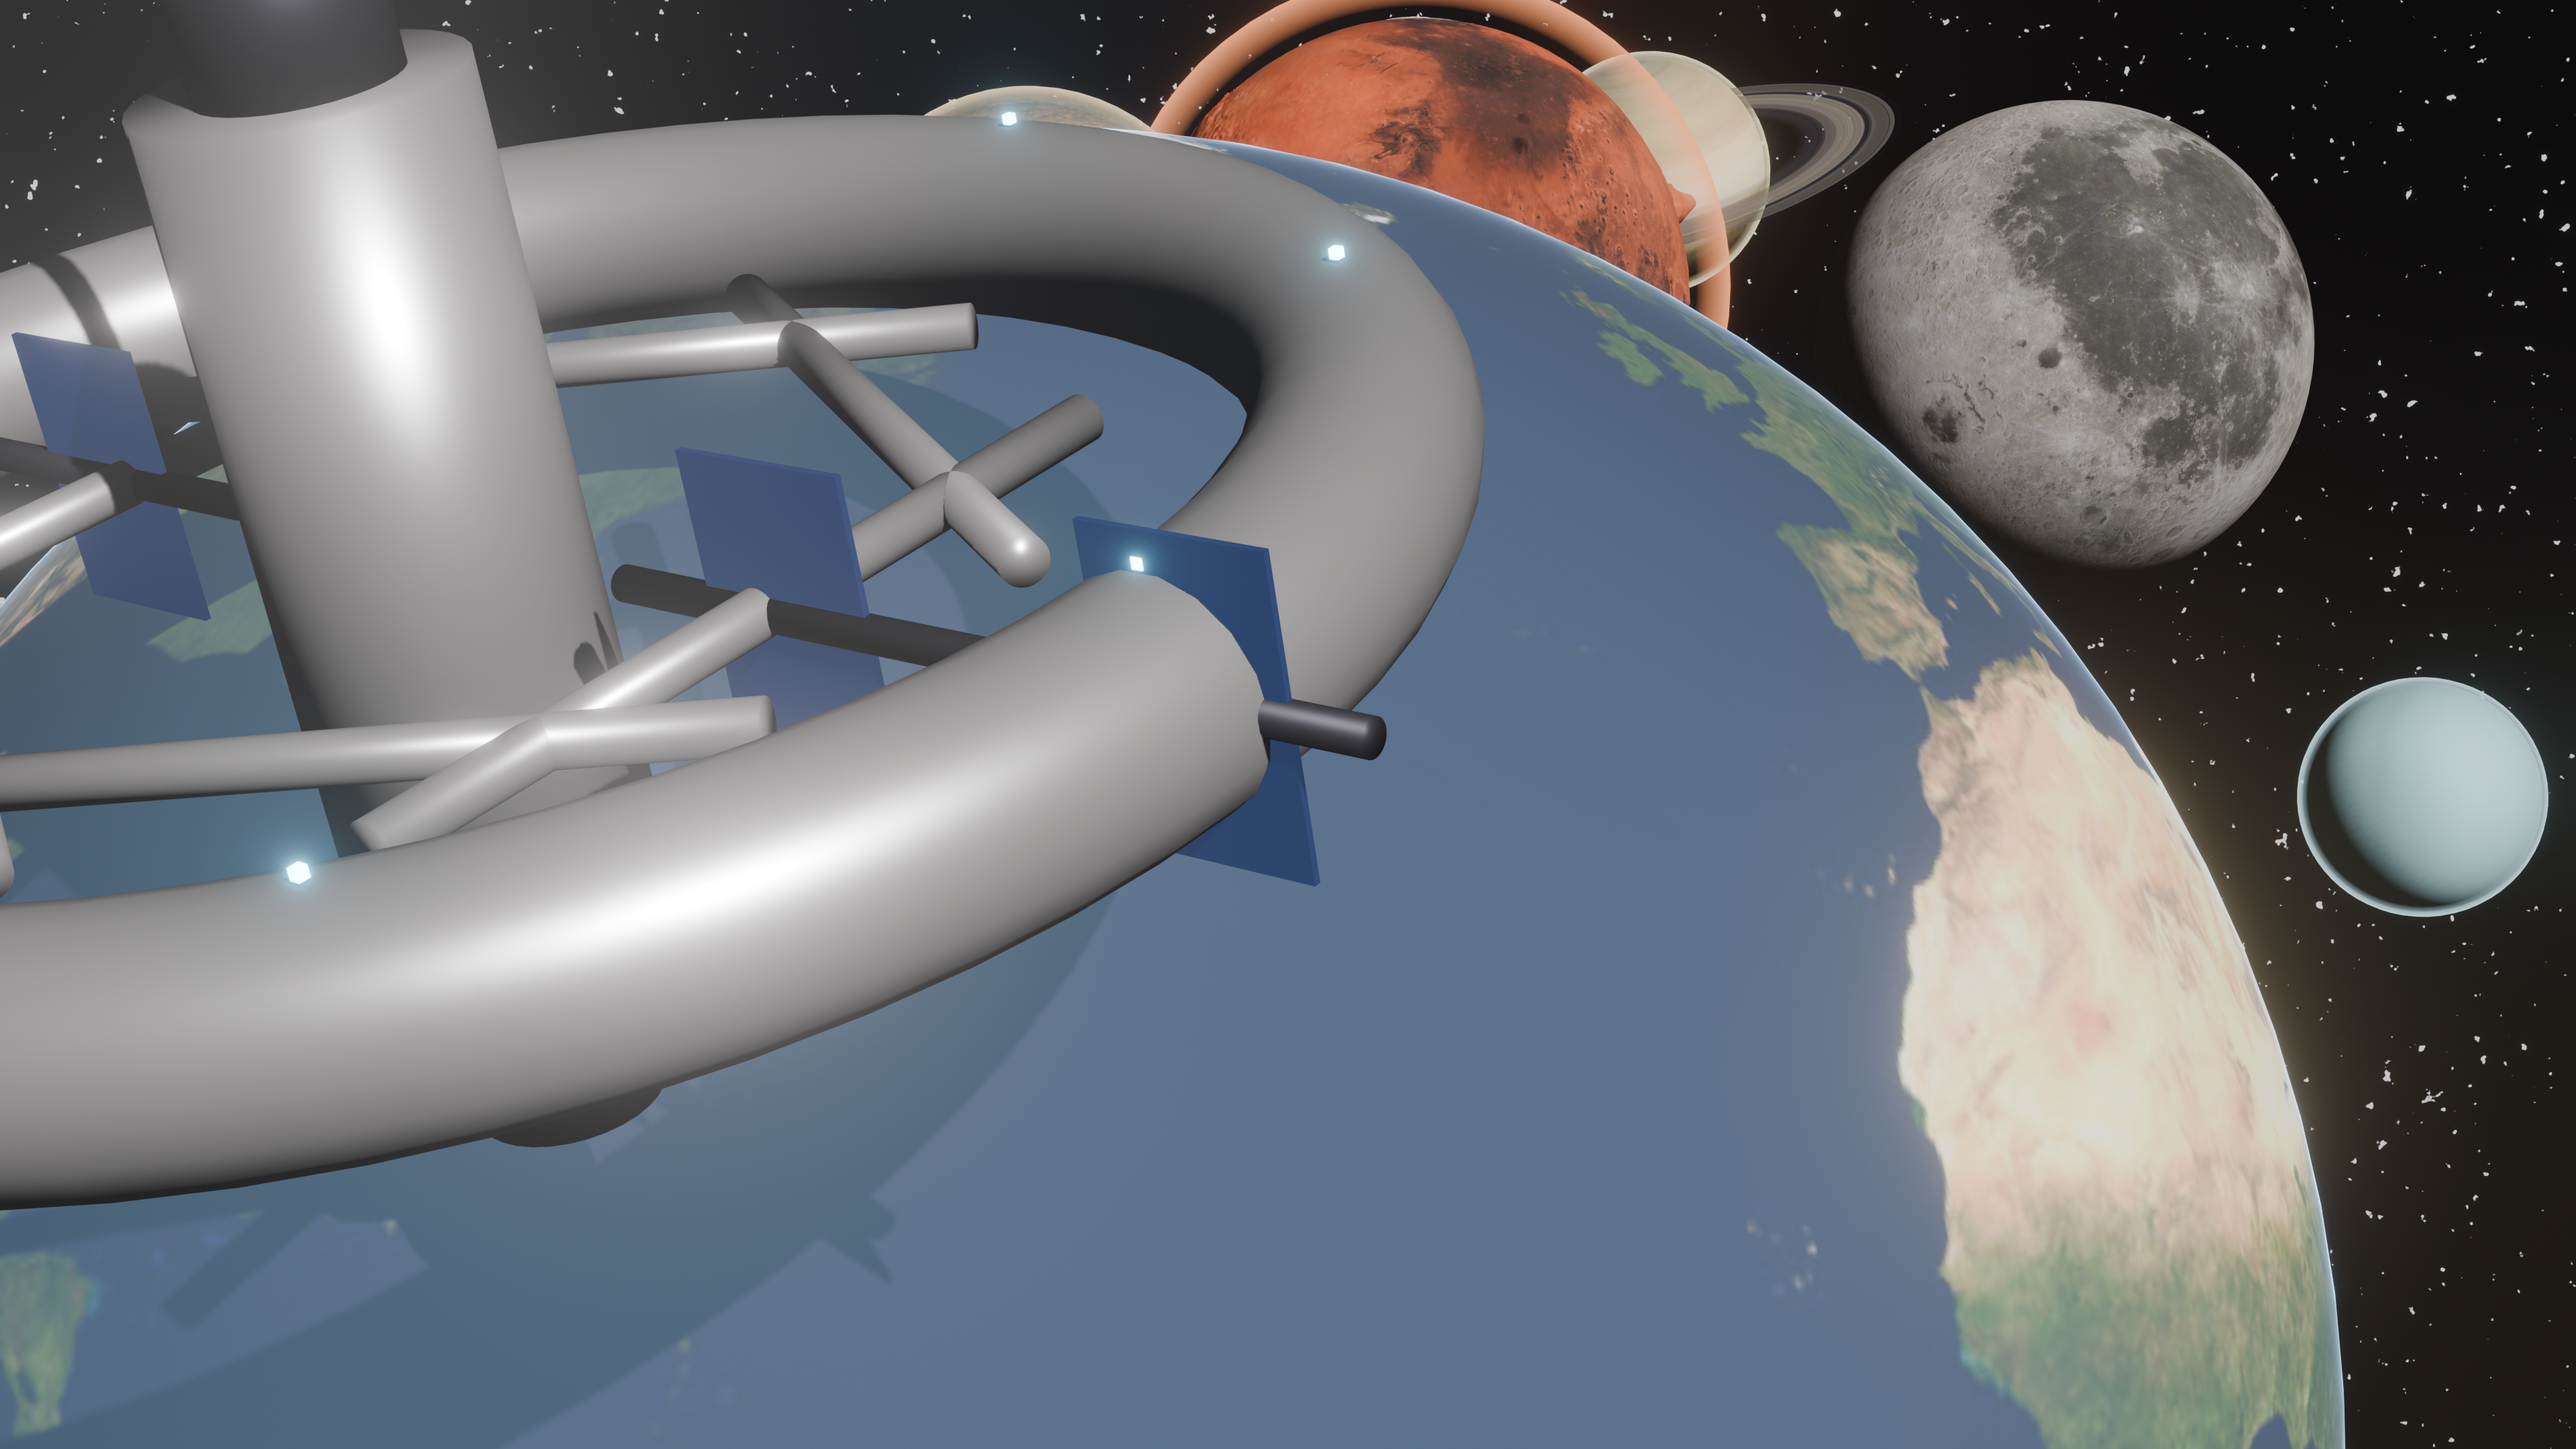
Most of the projects I write up here are things — a game, a bridge, a tool. This one is a little different. Blender Planets is a reusable Claude Code skill: a written capability that Claude loads on demand, encoding how to build a believable planet, moon, or gas giant in Blender from real NASA-derived map data instead of procedural noise. It isn’t a single scene I rendered once. It’s the recipe, the gotchas, and a set of helper functions, packaged so that the next time I say “drop Mars into this shot,” Claude already knows how to do it well.
What it is
A skill, in Claude Code terms, is a Markdown file (plus optional references) that gets injected into Claude’s context when the work matches its trigger. This one triggers whenever I’m “placing a textured sphere into a scene, adding an atmosphere glow, planetary rings, or real terrain relief, or when a planet looks like a flat red/blue decal.” That last clause is the honest origin story: the first time I asked for a planet, I got a flat-shaded ball that read like a sticker. The skill exists so that never happens again.
What it encodes is general, not one-off. It doesn’t say “here’s how I made this Mars.” It says: here’s how to build any rocky body, any gas giant, any moon — where to get the real imagery, when to add true displacement versus just a bump, how to make the atmosphere read as haze rather than a hard ring, and how to land the body precisely in frame next to other objects without it floating off or hiding behind something. The hero image above is the scene that validated all of it: Earth with real continents, Mars with its rust surface and a thin atmosphere halo, the cratered Moon, and a ringed gas giant, with an orbital station thrown in for scale.
How it works
The whole philosophy is real maps, never procedural noise. Procedural planets always look fake up close, because real planets aren’t noise — they’re continents and craters and cloud bands that we recognize. So the skill sources actual equirectangular imagery and wraps it on a UV sphere whose default UVs already map equirectangular projection correctly.
The map data comes from two NASA-derived sources, both credited in the skill:
- Solar System Scope for the color maps — equirectangular color maps (up to 8K) of Mercury through Neptune (CC BY 4.0, Viking/MOLA-derived), plus a Saturn ring alpha map.
- Planet Pixel Emporium for grayscale elevation/bump maps —
marsbump,moonbump,earthbump. These are the MOLA (Mars Orbiter Laser Altimeter) and LOLA (Lunar Orbiter Laser Altimeter) datasets, the actual laser-altimetry surveys of Mars and the Moon.
From there the recipe forks by body type. For a rocky body, the elevation map does double duty: it feeds a Bump node for fine shading detail and a real Displace modifier (over a simple subdivision) so the terrain physically breaks the silhouette — Olympus Mons actually pokes out, craters are real geometry, not a painted illusion. For a gas giant, there’s no elevation at all; the bands live entirely in the color map, so displacement is skipped and Saturn just gets its rings.
The atmosphere is a separate sphere a few percent larger than the planet, with a material that’s transparent except at the grazing angle. A LayerWeight → Facing output drives a color ramp into a mix between a transparent and an emission shader, so the glow only appears at the limb — a Fresnel rim halo. That’s what sells “this body has air” without a volumetric.
The part I think makes it a real skill rather than a snippet is the bundle of reusable helpers in references/planet-toolkit.md: download, build_planet, add_atmosphere, add_rings, place_in_frame, and closeup. They’re paste-into-execute_blender_code functions, plus a per-body cheat sheet — Mars gets thin rust atmosphere and MOLA relief, Saturn gets pale-gold haze and a ~26.7° tilt, Uranus rolls on its side at ~98°, and so on. Claude doesn’t reinvent any of this per scene; it fills in the parameters.
The gotchas
These are the ones the skill captures because they cost real time the first time around.
Height maps have to be loaded as Non-Color, or the relief comes out wrong. This is the quiet one. If you load a grayscale elevation map as a normal sRGB color texture, Blender applies the color transform to it and your bump and displacement both go muddy and inaccurate — the elevations are simply wrong. The fix is a one-liner: set the image’s colorspace_settings.name = 'Non-Color' before wiring it into the Bump and Displace nodes. The skill flags it twice because it’s invisible until you notice the terrain doesn’t match the real planet.
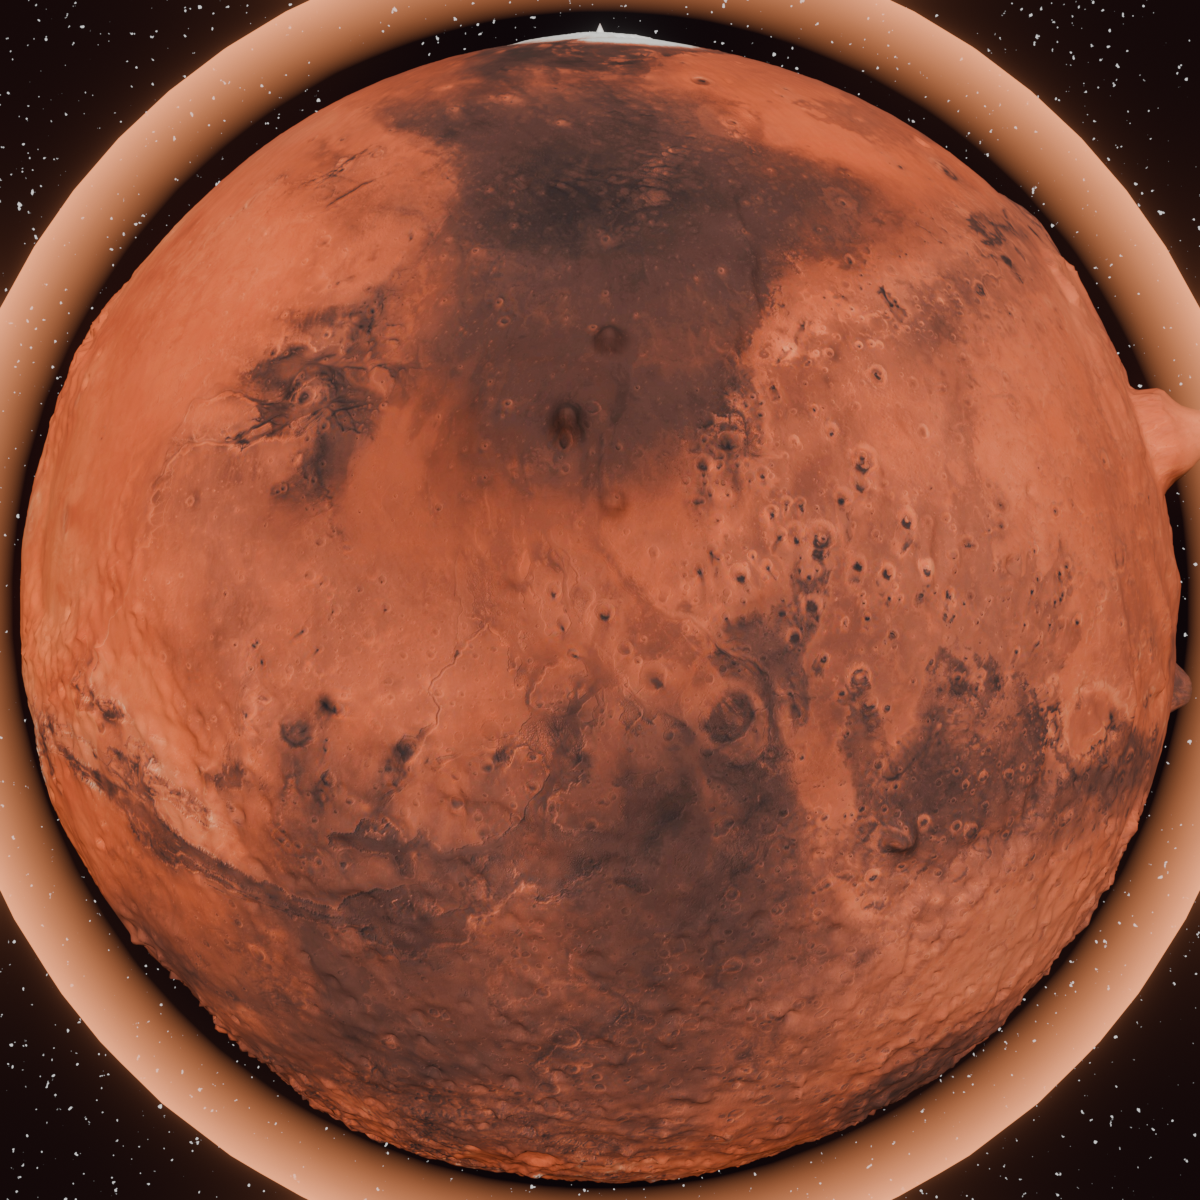
Strong displacement makes peaks punch through the atmosphere shell. Once the Mars relief is real geometry, the tallest features can poke out past the atmosphere sphere, leaving an ugly hard ring where terrain intersects haze. Two fixes, and the skill gives both: size the shell above the maximum displaced radius (base*scale + strength*0.5*scale), or widen the Fresnel color ramp so the halo reads as soft haze that swallows the intrusion rather than a thin detached band. The Mars closeup below is what it looks like when that’s tuned right.
Getting a planet precisely “in frame” is harder than it looks — don’t hand-roll camera vectors. My instinct was to compute the camera’s right and up vectors and offset from there. That breaks the moment the camera has any roll. The skill’s place_in_frame instead uses cam.data.view_frame(scene) to get the four actual frustum corners, interpolates between them bilinearly for the target screen position, and then verifies the result with world_to_camera_view — which returns normalized device coordinates where x and y should land in [0, 1] and z is depth. That depth value also tells you whether the body is hidden behind foreground geometry. The rule the skill states plainly: never assume a planet sits in frame — check the NDC.
Why a skill
I could have just kept the Blender Python for that one Earth/Moon/Mars scene lying around in a file. The reason to make it a skill instead is that the knowledge is reusable and the per-scene work is not. The hard-won parts — that elevation maps are Non-Color, that the atmosphere shell has to clear the displaced peaks, that camera placement needs frustum corners rather than basis vectors, that gas giants get no displacement — are the same for every planet I’ll ever build. Encoding them once means every future scene starts from the validated version instead of from my first flat-decal mistake.
It’s also built on top of a more general blender-scripting skill — probe the API instead of assuming it, isolate work in its own scene, build then render then look. Blender Planets is the planet-specific layer on that foundation, which is itself a small argument for how these skills compose: a general discipline at the base, a domain on top.
The skill is validated in production on the scene at the top of this post — Earth, Moon, Mars, and a ringed giant, all from real maps, with real relief and real atmosphere halos. Credit where it’s due: the color imagery is from Solar System Scope and the elevation data from Planet Pixel Emporium, which packages NASA’s MOLA and LOLA altimetry. The skill’s job is just to put that data on a sphere correctly, every time.
This is one of a series of posts on projects built this way. The running list is on the projects page.